DOS

So in order to make DOS games in 2021, there are several options. None of them are perfect, but after studying all the options, I’ve discovered the two options I believe to be the best. There are more options if you specifically want to make adventure games. For that you can use either, an old version of AGS, AGI, SCI Studio, or SCI Companion. However, this article will assume you want an open ended system that will allow you to make any type of game. You will need to know C to continue.

I narrowed it down to FreeBASIC and OpenWatcom C. This article will specifically focus on OpenWatcom with the Allegro game engine. I found this to be the best choice for multiple reasons including speed, flexibility, and development on Windows (instead of inside DOS). OpenWatcom was also the compiler used to make DOOM and it’s very fast compared to the primitive Turbo C and the GNU DJGPP. The fact you can build your games in Windows helps a lot too because you can read the code on an HD screen and not be limited to the low resolution of DOS.

So to start out, you should probably download the PCX plug-in for Paint.NET. This will allow you to produce an old compressed image format that can be loaded by your game. The other option is just using bitmaps and that will use more space. And no, there’s no JPG, PNG, or GIF here 🙂 PCX is basically an old fashioned PNG file.

1. Now you can download OpenWatcom V1.9 from their main website. Version 2.0 might also work, but I didn’t try it. Now install Watcom with all the DOS options enabled.
2. Goto this link and download the alleg.lib: http://matejhorvat.si/en/dos/allegwat/allegow.zip
3. Download the allegro source and extract: http://cdn.allegro.cc/file/library/allegro-4.2.3/all423.zip
4. In the directory you extracted, run fix.bat watcom.
5. Copy the lib you downloaded to .\WATCOM\lib386\dos
6. Copy the fixed include files from the thing you extracted into .\WATCOM\h
7. Comment out line 36 in .\WATCOM\h\ALLEGRO\PLATFORM\ALWATCOM.H
8. Open Watcom (LITERALLY – Open Open Watcom) and make a new project – choose 32-bit DOS using DOS/32A LE.
9. Goto Linker Switches #2 and put alleg.lib under Libraries (NOT Library Files).
10. Goto C Compiler switches #5 and disable stack depth check.
11. Goto C Compiler switches #10 and select 80386 stack-based calling -3s.
12. Now you can just add the exhello.c (hello world example) to your project and do a makeall.

It should now be working and have made an EXE file about 757KB.
(Make sure you are adhering to the C89 standard. So basically declare all variables only at the beginning of code blocks and make sure all functions/methods are written above what’s calling them.)

When you create the watcom project, I recommend using DOS/32A LE. This way it’s smaller and there is no need for an external DOS extender like DOS4GW. Initially my EXE was 757KB which is really big just to draw a sprite, so I ended up following the guide here:
https://liballeg.org/stabledocs/en/alleg043.html

…which made my EXE down to 500KB with no sound enabled (I’m going to use PC speaker). It’s still bigger than I expected, but I couldn’t figure out how to further optimize. I tried the space optimization in watcom and it only saved like 5KB. So I downloaded UPX for DOS and applied -9 compression and got 200KB. And that’s with the DOS extender linked in, so that’s good enough for me.
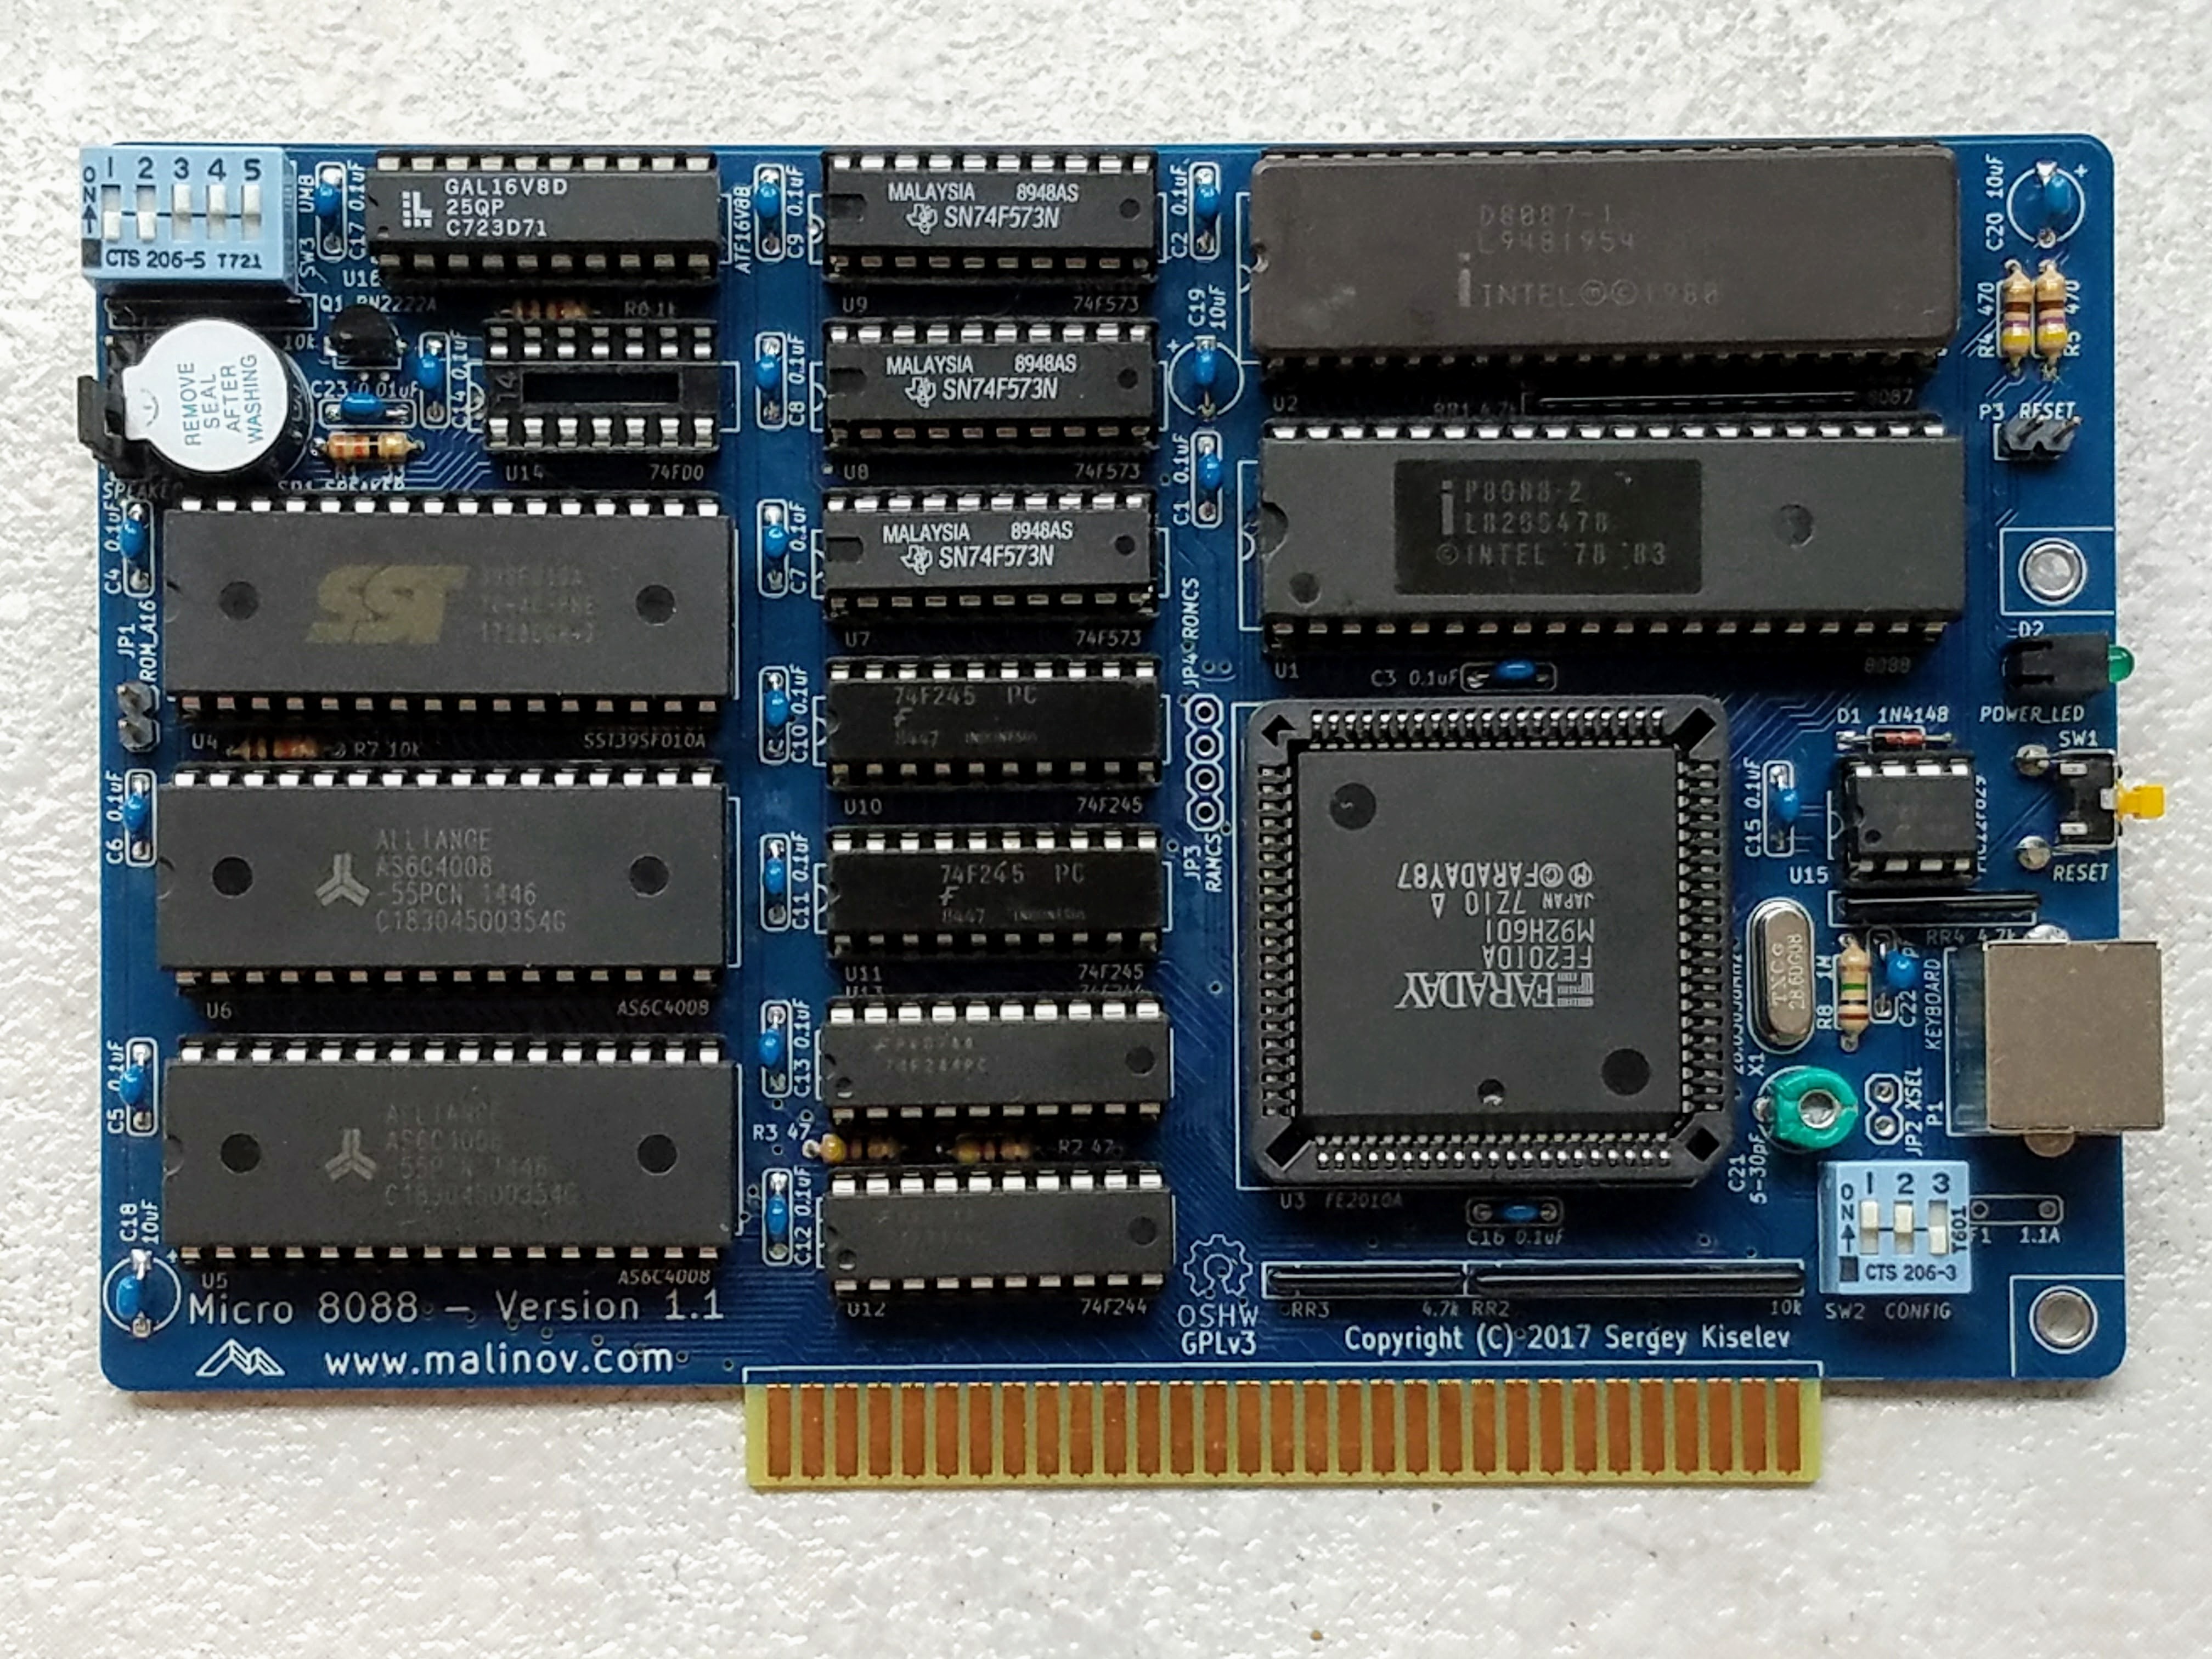
So I’ve decided to take a break from the radio stuff again and I am going to be building an IBM PC clone system using a modern kit. Sergey’s 8088 boards create a clone of the original PC using some more modern components that are easier to source (there are still a few old things in there). It is not an emulator or some modern FPGA; it is truly an 8088 system.

Micro 8088 (this is the one I will be discussing) :

Xi 8088 (this is the more complex alternative) :

The board is a fair bit better than the original IBM PC in that it uses a chipset like modern computers do. This makes the project a lot simpler to build because there are much less extraneous chips. It uses a Faraday chipset FE2010A which can still be purchased on eBay. The rest of the components can be sourced on mouser or digikey, except the CPU which comes from eBay also. This kit supports the NEC V20 which is an improved version of the 8088 supporting 9.55 MHz CPU speed and a few extra instructions from the 286. The original PC was only 4.77 MHz. The board can also be set to this slower frequency for older programs that did not have a speed sensing feature (and run way too fast on higher speed CPUs).

The system should support older DOS programs, but it’s not powerful enough for games like Doom. It can handle King’s Quest 1-4 pretty well and maybe even 5-6 with some lag, we will see. It should also support QBASIC and VBDOS which is what I am mainly excited about because QBASIC was how I first learned to program. I didn’t even know what programming was when I first loaded it up. I was just messing around on my mom’s computer, but when I realized what it was, I got obsessed and ended up making a few games and a math practice program for my younger brother that was currently learning his times tables. It would be incredibly cool (in a nerdy way) to run my own programs on my own system built from scratch, so this is my goal. It may not be fast enough, however…

There are a couple videos on youtube of people building this kit, but my aim is to get the clock speed as high as possible. I also ordered a PCB for Sergey’s (the designer of the board) other kit, the Xi 8088 which is a much more full featured version of this that allows much more extensive overclocking. The NEC V20HL CPU is the fastest in this class, allowing a clock speed of 16 MHz, which should be enough to run my programs. However, in order to run this CPU at full speed, an adapter called the PC Sprint will have to be used. This board creates a separate clock generation chip for the CPU so that you don’t have to overclock the whole board just to speed up the CPU. This is important because this board and the ISA bus is not designed for much more than 10 MHz.

So when it arrives, I’ll build the Micro 8088 and see how it performs and then I’ll build the Xi 8088 if I am unable to reach 16 MHz. See, the CPU is actually designed for that frequency, it’s just that the board does not support it. Hopefully the adapter will work.

If this goes well, I may purchase some more PCBs from China and offer this as a kit for sale. The problem is that right now, you can only purchase the PCBs on eBay or from OSH Park at an inflated cost and there are no kits available with the parts included. You have to source all the parts and PCBs yourself. So if there is interest (which I doubt LOL), then I will provide these kits given that I am able to make it work.

I may also do a video on this project for TI. Something like, “Extreme overclocking the original PC clone” might get some attention. I think it’s really fun cause you always see people overclocking new hardware, but what about pushing the original PC to its limit?

OK, here are all the relevant links:

https://github.com/skiselev/micro_8088

http://www.malinov.com/Home/sergeys-projects/xi-8088

https://www.ebay.com/usr/fmv.electronics1

https://ctrl-alt-rees.com/2020-03-02-overclocking-the-ibm-5150-8088-cpu-with-pc-sprint.html